Time for me to contribute to the community by sharing my experiences. First review, pls be easy.
Very happy with these lights: bright, uniform, elegant, use little power, and easy to install. When I first started the project I was looking into the traditional recessed lights with cans but ran into problems with ceiling joists. With these lights there is no need to worry about ceiling joist locations. Plus they save money. They average ~$15 a piece, better than what you can do with cans.
Suggested improvements: 1) The power box needs to have wire clamps. Without clamps the romex just hang on by wire nuts. 2) The lights are held in place by spring clamps to the ceiling drywall. They are strong and secure but when you want to take the light off and re-install, you may damage the edge of the ceiling drywall. There needs to be a better solution.
Want to share some of my experiences here, hoping other DIYers can benefit from my learnings:
- Color selection: I understand color is of personal preference. I got warm white (3000k) first but didn't like the yellowness (even for the family room). Cool white (4000k) seems to be much better choice in my opinion. My dining room is 12x13, and I installed 6 lights around the perimeter. The original chandelier is in the center. The 6 Torchstar made the room really bright and pleasant. But when I turn on the chandelier which has 6 warm white candelabra LED bulbs, the room is like on fire. It was a pleasant surprise.
- Design layout before cut holes: Design and pin (using a push pin) on the ceiling first. I found 24" from the wall seems to be a good distance. Distance between lights can be 6 feet or more depending on the number of lights you want to install. In any case you'd want a designed pattern rather than something random. I saw newly remodeled homes with irregular recessed lights patterns and they look bad.
- Installation: Buy a 6" hole saw (6-3/8"). It makes much better/cleaner cut than using a drywall hand saw. I bought one from Lowes for 20 dollars but I am sure others would work just as well. Use a cordless drill/driver and set it on one of the clutched settings rather than on drill setting. The saw is large and may bind and when it does it will either ruin the ceiling tile or twist your arm if it is set on drill. The clutched setting will save you a lot of trouble. When cutting at location with an existing hole (an existing ceiling light location for example), screw in a piece of thin board across the hole first. The board will keep the saw centered while cutting. Otherwise the saw will walk everywhere, mess up the ceiling.
- Get dimmer switches: You'll definitely need dimmer switches for the lights. I used Leviton Decora dimmer switches because they matched my existing Decora style switches. But any LED dimmer switches would work.
These lights are fantastic, the designers did a great job at the heat management and I feel properly directed it to the ring around the light, not to the back side where it would be covered in insulation. I tested it out for several hours before installing in the ceiling, and found the ring gets warm, yet the back of the light stayed cool.
The light color was a good match at 3,000K. The light angle is very shallow, which helps to reduce dark areas on the ceiling. the metal springs hold the light in place very securely. You need to be careful removing the light since the strong spring might damage the dray wall.
Also I cut the hole in the ceiling with a an adjustable Hole Saw by Klein Tools, which includes a dust cover, that reduced the amount of dry wall dust.
The one drawback: I used romex cable 14 gauge with a plastic jacket, but the sharp metal housing doesn't have a grommet to protect the romex from getting cut. So I had to run to the local hardware store to pick up some grommets.
I like these lights. There are some cons, but these were manageable.
The junction box is a bit of a nuisance as the ears to mount the box to a beam are small and close to the knock outs for the service wiring. You'll need to buy small screws; take the box with you to the hardware store. I think I got 3/4 inch and that was plenty of length.
Because the box is thin, you need to tighten down the cable clamps (3/8" purchased separately) with the screw heads facing the beam, before you mount the box. Then you can mount the box. The leads from the box to the light, and the light to the box, are a little short, but worked out just fine.
Note that I cut holes in the ceiling tiles, and mounted the light directly into the tiles. The lights weigh 8.5 ounces, so there's no problem with the tiles sagging. I used the Dremel hole cutting attachments (678-01 Circle Cutter and Straight Edge Guide; $10--we already had the Dremel tool). This method was easy. But, as mentioned above, be sure that the box is mounted as close as possible to the light because the lead isn't very long.
The lights are nice, 3,000K seems like a good color for a rec room (basement). And 850 lumens is a bright light. I have eight of them, four feet apart, across a room that's about 30 by 15. Almost too much light without the dimmer. I used a Lutron Maestro; MACL-153M-WH. Plenty of range, no flicker.
As these are not recessed, the lights shine in your eyes a little as you walk into the room. But the specific application is surface mount, so that's the way it goes. I didn't have room for recessed cans.
These are so great, I put up 34 of them in the house. I had one where there was a beam right down the center of my ceiling, I cut the hole 6" which left 1" on either side of the beam, plenty to fit the clips on either side. Wired the junction box in the attic and installed the light from the main room. The 1/2" clearance I was able to get this light to fit with ease. There is no recessed light that can do that! These are great lights, extremely happy with them. No noise when you dim or flickering. I used the Diva dimmer.
Installed 5 in the kitchen so far and I have nothing negative about them to say. They are thin, the box is compact and easy to fit through tight space. I spaced them 24” from my kitchen cabinets and 4’ away from one another using as well one above the sink. I like daylight as I am going to put a dimmer switch on them. The living room will be placing 36” away from the wall and about 5 1/2’ away from one another. Just purchased another 8, but will be purchasing more to complete the House.

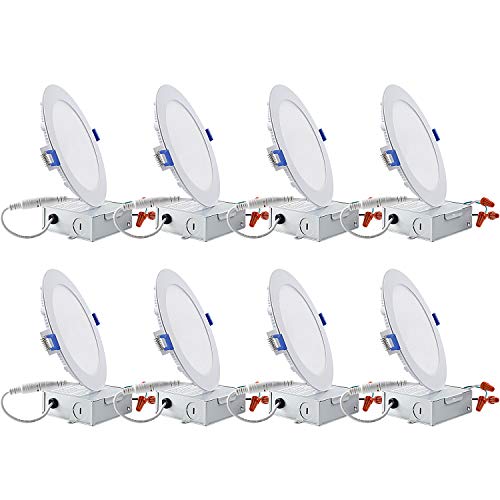
Feature Product
- Space-saving Solution: Ultra-thin LED recessed ceiling light, high brightness. Only requires 2 inches clearance of ceiling space , perfect solution for your narrow ceiling that doesn't fit for a can
- High-efficiency Lightness: Energy Star certified wafer light, only consume 12 watt, provide 850lm brightness which equals to an 100W halogen lamp, saving $2788 per set in its 36,000 hrs lifespan; frosted LED lens, anti glare and scratch resistant
- Simple Installation: Connect the provided J-box to the light using male/female cable and use spring clip to fix it on the ceiling, hassle free, install in seconds. Recessed can is no longer a limitation for your choice
- Reliable Safety: ETL-listed safety standards, the aluminium lights guarantees corrosion protection and rust prevention, and the sponge gasket effectively improves the sealing performance, which is a perfect fit for your roof and ceiling
- Widely Application: 5%-100% smooth dimming, compatible with most dimmers, the light would meet various needs in applications such as closets, kitchens, hallways, doorways, basement and so on
Description
This warm white wafer light would just be the one you want if you are troubled by the little space
of ceiling or high electricity costs.
Space-saving Design:
For solving the problem that the ceiling is too small to install the normal LED flush light panel, we launch this
recessed slim panel LED Downlight which only occupies 2 inches in height without housing can, supporting retrofit,
remodel or new construction installation.
Energy Conservation:
The light use 90% less energy compared to incandescent and halogen bulbs, and save the $348.5 electricity
cost per light in its 36000 hours lifespan.
Easy and Safe Installation:
The slim design allows for easy retrofit, remodel or new construction installation from below the
Ceiling. Only need 2 inch clearance for installation.
Strict Safety Standards:
Its structure could effectively prevent moisture and heat so that it is suitable for use in humid
environments. Rugged aluminum housing ensures corrosion resistance and excellent heat dissipation.
Widely Application:
The light would meet various needs in applications such as Closets, attics, hallways, bathrooms, kitchens,
basements and any other small areas. Also, we provide you with a 5-year warranty to protect your interests.
Warranty
Comes with 5 years product warranty for customer's rights and benefits, satisfaction guarantee.
Specifications
CRI: >80
Power: 12W
Luminous Flux:850lm
CCT: 3000K Warm White
Dimmable: Yes
Surface Size: 6.85 inches
Back Hole Size: 6.25 inches
Lifespan: 36,000 hrs
Warranty: 5 years
I will never go back to installing traditional recessed/can lights again. These make the process infinitely easier and less stressful. I have used these in a couple places around the house--the livings room and the kitchen.
Our living room did not have ceiling lighting installed when the house was built, just switched receptacles. Upon marking the location for the planned cans, it became clear that a number of them would fall directly below ceiling joists. Traditional cans then were really not an option. These stepped up to the plate to save the day. They fit comfortably within the depth of the drywall, allowing the joists to pass directly over them. They look exactly like traditional recessed lighting, and in my opinion even better, as they have a more seamless look. All the lights were installed in a matter of hours.
We ran into a similar issue in our kitchen remodel, though I would have used these regardless, as they have performed extremely well in the living room. They also work well with our Lutron smart dimmer. Couldn't be happier with the product. These will be our go-to light for remodels from now on.
Very bright. They do not look cheep. My electrician loves them. Said they were so easy to install he "almost" hated to charge me for it. I have them hooked up to a dimmer that can be controlled by Alexa or Google Home. I love not having to get up out of bed to make sure my kids turned off the lights. Led's are huge power savers. I definitely recommend these lights.
Was very surprised at how easy these installed and how wonderful bright they are. Some complain that they are over 6" for the ceiling hole. I just used a 6 inch hole saw and then notched the spots with a good utility knife for snug fit. You could do the same with any drywall saw or zip saw. It was still easy. The junction boxes are also straight forward and simple. Good experience with this product. I don't do them often but I think they dim ok. Really it seems like 50% then off but that seems common with all my LED lamps. Just something to be aware of if you're looking for that fade that incandescent does.
Lights work beautifully, are easy to connect, and seem to be built well. However, the only complaint is the fact that the hole needed for install is NOT 6”. It’s 6-3/8”. So if you buy these cut your ceiling hole just larger than 6”, it will save lots of terrible words from being said.
Great design. I cannot speak to longevity. The design is great for retro fits and tiny houses. The "housing compartment" is small. For one primary feed the space is sufficient. Two wires is (too?) tight. To the makers of this light: add maybe 3 or 4 more CUBIC inches in the box and this thing would be perfect.

0 Komentar